Installation or repair of reverse osmosis (water purification plant)
- Experts without intermediaries
- Price comparison
- Personalized pricing
* it's free and takes less than 5 minutes


Reverse osmosis installation and repair in Spain
Clean drinking water at home is not a luxury — it’s a basic comfort. In many regions of Spain, tap water has high hardness levels, elevated mineral content, and a noticeable chlorine taste. That’s why reverse osmosis systems have become a popular solution for apartments, townhouses, and private homes.
Reverse osmosis is a compact filtration system installed under the kitchen sink that purifies water at a molecular level. However, for the system to work efficiently and safely, it must be installed correctly and serviced regularly.
Our service helps you find a trusted specialist near you — whether you need a new installation, filter replacement, or system repair.
How a reverse osmosis system works and why proper installation is critical
A reverse osmosis system is a multi-stage filtration process in which each component has a specific function. To ensure truly clean water and a system lifespan of 8–15 years without leaks or failures, not only high-quality equipment but also professional installation is essential.
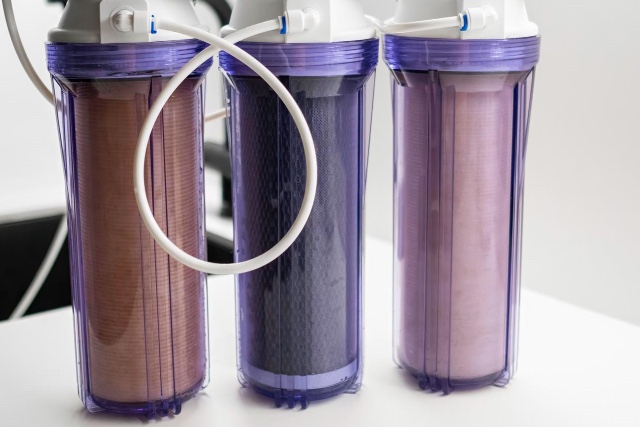
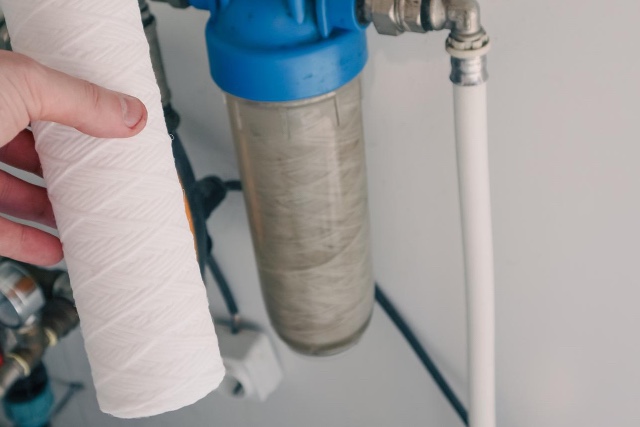 Pre-filtration (mechanical filtration) At the first stage, water passes through a sediment cartridge (usually polypropylene).
If this filter is installed incorrectly or not sealed properly, contaminants can pass through and shorten the membrane’s lifespan. | 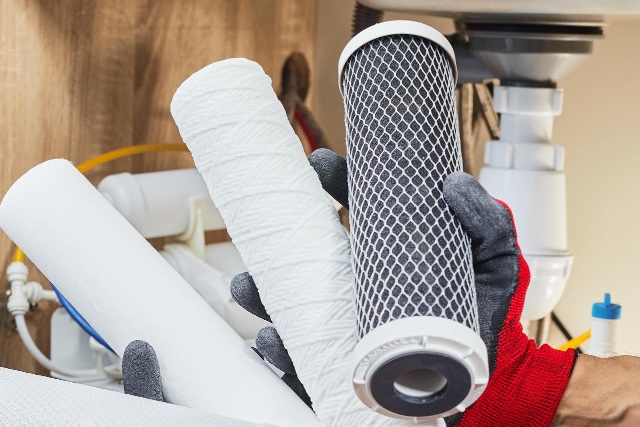 Carbon filtration The second cartridge (sometimes two) contains activated carbon.
In Spain, this stage is particularly important, as chlorine levels in some municipalities are relatively high. If the carbon filter is not replaced on time or is improperly installed, chlorine can damage the membrane — the most expensive part of the system. |
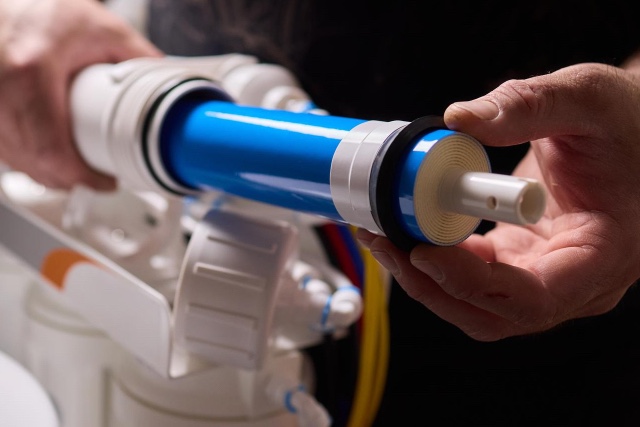 The reverse osmosis membrane — the heart of the system The membrane allows only water molecules to pass while retaining:
At this stage, 95–99% of dissolved substances are removed. If water pressure is too low or installation errors occur, the membrane may function improperly:
| 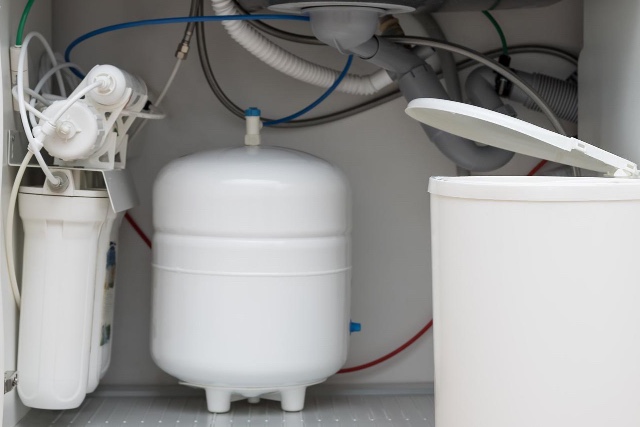 Storage tank After purification, water flows into a pressurized storage tank. Proper air pressure adjustment inside the tank is critical:
|
 Post-filter (final polishing) Before reaching the faucet, water passes through a final carbon filter. If the system is not serviced regularly, this element is usually the first to affect taste. | 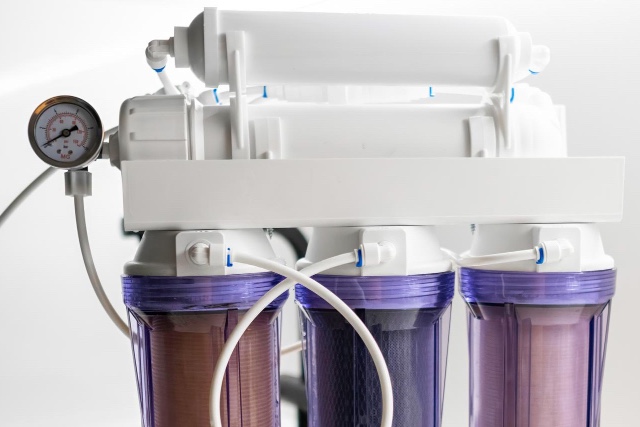 Additional mineralization and pH adjustment (optional) Some systems include a remineralization cartridge or pH correction filter after the post-filter. Its purpose is to:
This is especially relevant in areas with very hard water, where deeply purified water may taste unusual at first. Important: a remineralizer does not replace the membrane and does not “improve” contaminated water. It only works after full purification. If installed incorrectly or not replaced on time:
|
A reverse osmosis system is a sequential multi-stage process where each stage depends on the correct performance of the previous one. That is why professional installation and regular maintenance are essential for consistent results.
What professional installation or repair includes
Installing a reverse osmosis system is not just “attaching a filter under the sink.” It’s a technical adjustment of the system to your home’s specific conditions: water pressure, water quality, plumbing condition, and kitchen layout.
A professional approach helps:
- prevent hidden leaks;
- reduce water waste;
- extend membrane lifespan;
- ensure stable water pressure;
- eliminate noise and continuous draining.
Here’s how proper installation or repair is carried out in practice.
1. Technical assessment before installation.
Work begins with evaluating the existing conditions.
The specialist:
- measures static and dynamic water pressure;
- checks the shut-off valve;
- inspects the condition of flexible hoses;
- evaluates possible pressure fluctuations;
- determines whether a booster pump or pressure regulator is required.
Skipping this step can result in premature membrane wear or unstable system performance.
2. Under-sink layout planning.
Every kitchen is different: siphon type, garbage disposer, dishwasher, limited space.
The technician plans:
- filter housing placement;
- storage tank position;
- tubing routing without bends;
- easy access for annual cartridge replacement;
- protection of furniture from moisture.
Proper layout ensures long-term service convenience.
3. Correct cold water connection.
The system is connected neatly without modifying the main plumbing.
The specialist:
- installs a quality adapter or tee fitting;
- uses appropriate sealing materials;
- checks threaded connections;
- pressure-tests the connection.
Connection to hot water is strictly prohibited — it damages the membrane.
4. Proper drain line installation.
The drain line is crucial for stable operation.
The technician:
- selects the correct siphon connection point;
- installs a sealed drain clamp;
- checks for backflow;
- ensures proper height positioning;
- tests drainage during active filtration.
Errors at this stage lead to odor, noise, or continuous water discharge.
5. Professional filter and membrane replacement.
Repair or maintenance is more than “changing a cartridge.”
The specialist:
- checks all filtration stages;
- evaluates membrane condition;
- tests the flow restrictor;
- replaces automatic shut-off valves if needed;
- installs or adjusts a remineralizer if present.
All components are selected based on the specific system model and water characteristics.
6. Storage tank adjustment.
Inside the tank is an air chamber that affects water pressure.
The technician:
- measures air pressure in the empty tank;
- adjusts it to recommended levels;
- tests filling speed;
- checks automatic shut-off function.
Incorrect pressure is a common cause of weak flow or constant system cycling.
7. System flushing and technical startup.
After installation, the system undergoes proper startup:
- flushing of pre-filters;
- membrane flushing;
- initial tank filling;
- 1–2 complete tank drain cycles;
- monitoring fill speed.
This removes technical residues and prepares the system for safe daily use.
8. Real-condition testing.
The system is tested under actual working conditions:
- shut-off verification when the tank is full;
- checking for continuous drainage;
- evaluating water pressure stability;
- ensuring no unusual noise;
- testing the drinking water faucet.
9. Final leak inspection.
Before completion, the specialist:
- rechecks all connections;
- inspects after pressure build-up;
- ensures there is no moisture;
- secures tank positioning;
- leaves the installation area clean and dry.
The result: a fully adjusted system adapted to your home’s specific conditions and ready for long-term use.
Professional installation or repair is a complete system setup — not just a filter replacement. This approach guarantees quiet operation, stable water quality, and protection of your kitchen from unexpected issues.
Frequently asked questions (FAQ)
Below are the most common questions asked before installation or servicing — explained clearly and simply.
▸ Is reverse osmosis suitable for my apartment?
In 90% of cases — yes. If there is space under the sink and access to cold water and drainage, installation is straightforward.
▸ My kitchen is small. Is that a problem?
Not necessarily. Compact models are available, and tank placement can be optimized.
▸ Can I install a system without a tank?
Yes, but direct-flow systems require stable water pressure.
▸ Will the sink need drilling?
Usually a separate drinking faucet is installed, but 2-in-1 faucets are also available.
▸ Why might water pressure feel weak?
Usually due to system pressure or tank adjustment — this can be corrected.
▸ Why does water taste different after installation?
It’s normal during initial flushing. The taste stabilizes after full system rinse.
▸ Does reverse osmosis waste a lot of water?
Some water is discharged to drain — that’s how the technology works. Modern systems are relatively efficient.
▸ Is there a risk of leaks?
With professional installation, risk is minimal. Most leaks result from DIY mistakes.
▸ Should I turn the system off if I’m away for a month?
Yes, shut off water supply. Flush the system upon return.
▸ How do I know it’s time to replace filters?
Slower flow, taste change, or 6–12 months of usage.
▸ What happens if I delay filter replacement?
The membrane wears faster, and water quality declines.
▸ Can it be connected to hot water?
No. Hot water damages the membrane.
▸ Is electricity required?
Only for systems with a booster pump.
▸ We have very hard water. Will it work?
Yes, but maintenance may be slightly more frequent.
▸ Can I upgrade my old system instead of replacing it?
Often yes — membrane or pump replacement may be enough.
▸ Why does the system make noise sometimes?
Light noise during tank filling is normal. Constant noise needs inspection.
▸ Is it safe to drink RO water daily?
Yes. A remineralizer can be added for preferred taste.
▸ Can it be installed in a rented apartment?
Yes, if the landlord agrees.
▸ How long does the system last?
8–15 years with proper maintenance.
▸ What causes most system problems?
Delayed maintenance, improper installation, or ignoring early warning signs.